+28.08.09.JPG)
Our miniature house set was featured in pLUSSIZECRAZE. Thank you very much:)


 CJO1 Orchis Pavilion (Available)
 CJO2 Accompaniment of Cherry Blossom (Selling Fast)
 CJO3 Hunting for the Reading (Selling Fast)
 CJO4 Sainted Domicile (Available)
 CJO5 True Meaning of I go (Sold Out)
 CJO6 Elegant Courtyards (Sold Out)
 CJO7 Quiet Moment (Selling Fast)
 CJO8 Dinner Time (Sold Out)


 Preparation works: Get a pair of scissors, pen knife and a steel ruler. Make sure they are in good condition. These are the only tools needed. Easy right?
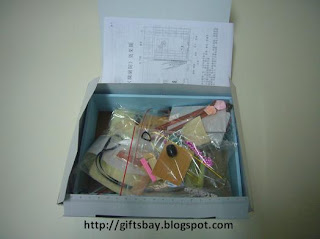
 These are the materials inside the box. It comes with a bottle of glue and a sand paper. These materials are properly divided into packets (A-D), together with a blue color frame and a board.
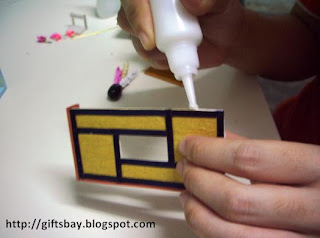
 Step 01 : Apply the glue provided all around the perimeter of the blue frame (W5).
  Step 02: Then place the board (W4) on top of it and stick them together to form a complete frame
 Step 03: Measure A01 paper to suit the size of the frame.
  Step 04: Cut out the additional A01 and then apply glue on the surface of the A01 paper.
 Step 05: Stick A01 paper on the frame
 Step 06: Repeat the same steps above to paper A02 (upper) and A03 (lower)
 Now the complete frame will look like the picture above.
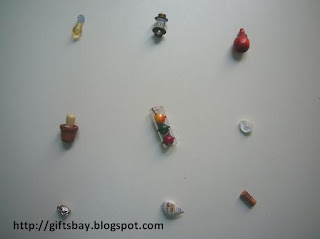
 Step 01: Ensure all materials as above are ready. Get it from Packet A.
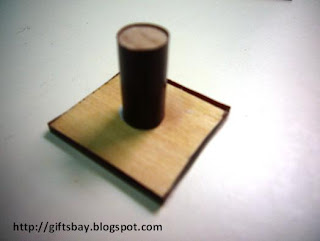
 Step 02: First, apply glue at one end of A07 and A06 and stick them together as a deck stand. Sand the end if not flat.
 Step 03: Sand A05 and A04 and glued them to become the deck surface.

 Step 04: Measure paper A08 to the deck size, cut out the additional paper and glued it on the deck surface.
 Step 05: Measure strip A09 to deck surface and stick them following the pattern above.
 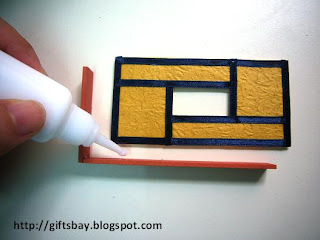 Step 06: Stick the deck surface and deck stand to complete the deck.

 Step 01: Ensure all materials are ready. Get it from Packet B.
 Step 02: First, we will assemble the 3 main door frames by sticking B05, B06, B07 and B08 together. This is quite tricky as it’s not easy to stick them properly and it need patient…..
  Step 03: Measure plastic B09 to 2 front doors frame and glued it to the door frame.
  Step 04: Next, assemble B01, B02, B03, and B04 to look like picture above…
 Step 05: Stick them together with the door frames and this is what we get : )
  Step 01: Get all materials to assemble ‘Drawing’ from Packet B.
 Step 02: First, we will assemble the frame by sticking 4 pieces of B011 together.
 Step 04: Next, cut out 2 leaves from B14


 Step 04: Next, assemble the teapot by sticking B18, B19 and B20 together
 Step 05: Measure B22 and glue B21 on the surface of B22
  Step 01: Prepare all materials to assemble ‘Chair’ from Packet B.
 Step 02: Measure paper B26 to the size of B23 and B25 and glued it
 Step 03: Assemble the chair by sticking B23, B24 and B25 together
  Step 04: Finally, the ‘Table’ with teapot and ‘Chair’ is ready as above


 Step 04: Stick C10 at the longer cupboard side and C11 at the shorter cupboard side.


 Step 04: For carpet, cut two pieces of D01 (1cm by 1cm) and stick it on D02 (2cm by 2cm).


and we will link you back:)
Copy the picture above or the html code as below:
<a href="http://giftsbay.blogspot.com/" target="_blank"><img alt="GiftsBay" src="https://blogger.googleusercontent.com/img/b/R29vZ2xl/AVvXsEh5gJDXkSoFacTZszIrbEJg_Ys8lVwJDZ6bkS2MC1SMSbe5UMzMdm5sWQs9JYymiDQLTtGa3aiYFN6xW6at1hWxH8YkkaV63cQbRkf-8xjaxfnfSD1kM4jFtDNMbNSHezxM28qUddy8Z_0H/s297/gblogo.JPG" border="0" /></a>